Getting Started with Embedded WASM - Development Environment (WAMR)
We all know that WebAssembly is great for the Web, but it’s also incredibly powerful in the embedded space too. You can compile Go, Rust, C++ and other languages for device families that don’t have compiler of build tools which support these languages. That’s in addition to the sandboxed and portable nature of WebAssembly of course.
I’ve been doing a lot of work with WebAssembly recently, and particularly in the embedded space. So I thought I’d give you a hands on guide on how to get started with WebAssembly for Embedded systems. In this post, we’ll cover setting up a development environment through to compiling and executing your first command line / non-web WebAssembly application.
Choosing Tools
There are a number of WebAssembly runtimes available and in a future post I might cover them all, but for now I’ll just explain that the single best runtime for embedded systems (in my humble opinion of course) is the WAMR. This runtime is used by Amazon Prime Video, Disney+ Streaming, Sony, Intel and others. It’s very well tested, written in c, and available for Windows, Linux, MacOS and of course a wide variety of RTOSs too. It is also one of the fastest runtimes I’ve encountered - but more about that in another post.
The Development Environment
The Ingredients List
We’re going to need the following items
-
A development machine (Ubuntu and tooling)
- A compiler and SDK (WASI SDK)
- A runtime environment (WAMR)
- A set of useful WebAssembly Tools (WABT - WebAssembly Binary Toolkit)
Step 1: The Development Machine
For this particular environment I’d recommend Ubuntu 22.04, but you can use the linux flavour or choice. You’ll need some additional packages installed to get going. These can be installed as follows:
sudo apt-get install build-essential clang cmake ninja-build wget curl git
Other useful tools
I normally install a bunch of additional stuff, including editors, tmux and midnight commander. They all come in handy at some point, technically these are all optional.
sudo apt-get install neovim micro mc tmux
Step 2: The Compiler and SDK (WASI SDK)
The WASI SDK project on GitHub provides the compiler and SDK we need. There are two choices, downloading and building the SDK yourself (hard) or the much more straightforward way of downloading the pre-built binaries and installing them yourself. For this tutorial, let’s go for the easy option.
You can find the WASI SDK here and you can find the pre-built binaries available on this page : https://github.com/WebAssembly/wasi-sdk/releases
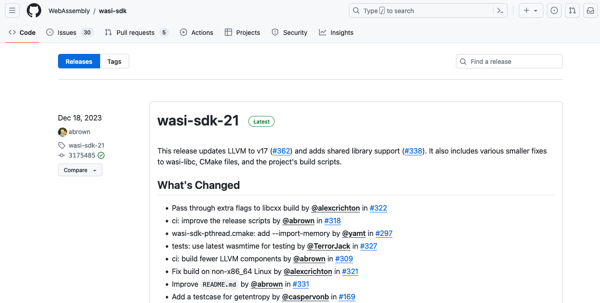
At the time of writing wasi-sdk-21 is the latest edition. Download and untar this
wget https://github.com/WebAssembly/wasi-sdk/releases/download/wasi-sdk-21/wasi-sdk-21.0-linux.tar.gz
tar -xf wasi-sdk-21.0-linux.tar.gz
NB: Unfortunately there is no arm64 builds of the WASI-SDK available, so if you’re using an Ubuntu VM on MacOS you’re stuffed. It’s a built it by hand task. - That might be a good task for a future post.
I normally place the SDK in the /opt/wasi-sdk/ folder on my Ubuntu installation:
sudo mkdir /opt/wasi-sdk
sudo mv ./wasi-sdk-21.0/* /opt/wasi-sdk/
Step 3: The Runtime
Now the compiler has been installed we need the runtime. Head on over to the WAMR Github pages. You’ll need to clone this project:
git clone https://github.com/bytecodealliance/wasm-micro-runtime.git
Once cloned you need to build the runtime, and the command line execution tool. WAMR is designed to be embedded in other bits of software and runtime environments. On linux it builds its self as a shared object, and then also provides a simple command line tool with this library embedded inside it. This tool is called iwasm and needs to be build explicitly.
First build the library:
cd wasm-micro-runtime
mdkir build
cd build
cmake ..
make
The build the linux specific command line tool, this is available in the mini-product folder:
cd ..
cd product-mini/platforms/linux
mkdir build
cd build
cmake ..
make
This will produce a local iwasm binary - this is our runtime. I normally copy this to a local bin folder under my home directory, but it’s up to you.
mkdir ~/bin
cp ./iwasm ~/bin/iwasm
Step 4: A set of useful WebAssembly Tools
The WABT (WebAssembly Binary Toolkit) is a collection of really handy tools. This includes tools which will decompile a web assembly binary file allow you to inspect the code that has been generated. This is kinda cool, and can be really useful when you are debugging, or trying to understand exactly what is happening behind the scenes with the compiler and tooling your using. Head over to the WABT Github pages.
The WABT pages have an awesome guide to building it, and, honestly, I’m just going to copy their instructions here:
cd ~
git clone --recursive https://github.com/WebAssembly/wabt
cd wabt
git submodule update --init
And then you just need to build the tool kit as follows:
mkdir build
cd build
cmake ..
cmake --build .
Testing the Development Environment - Hello World in Embedded WASM
At this point we should have all the tooling we need to get started building some C based applications. Let’s create a small hello world application in C and build it for WASM.
cd ~
mkdir hi
cd hi
Use your editor of choice to create hello.c, personally I’ve been playing around with micro recently:
micro hello.c
And of course, our hello world code:
#include <stdio.h>

int main(void) {
  printf("Hello World\n");
  return 0;
}
Save this and drop back to the command line. Building for WASM can be done like this:
/opt/wasi-sdk/bin/clang -o hello.wasm ./hello.c
This will result in a hello.wasm file:
$ ls -al
total 32
drwxrwxr-x   2 me me  4096 Jan 25 17:08 .
drwxr-x---+ 56 me me  4096 Jan 25 17:07 ..
-rw-r--r--   1 me me    76 Jan 25 17:08 hello.c
-rwxrwxr-x   1 me me 18812 Jan 25 17:08 hello.wasm
Running this is pretty straight forward, you just need to invoke the iwasm interpreter to execute it:
$ ~/bin/iwasm ./hello.wasm
Hello World
Once you’ve gotten this far, you’ve a working development environment - Congratulations.
Digging into the Binary Details
If you want to know what’s actually going on inside the hello.wasm binary, we can decompile it. This will translate the binary byte code into a human readable format called WAT. The tool for this is called wasm2wat . This tool was built was part of the WABT installation.
~/wabt/build/wasm2wat -o hello.wat ./hello.wasm
This will produce a hello.wat file containing the human readable WAT format. You can check this out in your favou
rite editor, I use nevoid since it provides WAT syntax highlighting.
nvim hello.wat
And here you go, “readable” wasm…

You now have a working development environment.